Crafting an Effective Ecommerce Chatbot Google Dialogflow: A Step-by-Step Guide
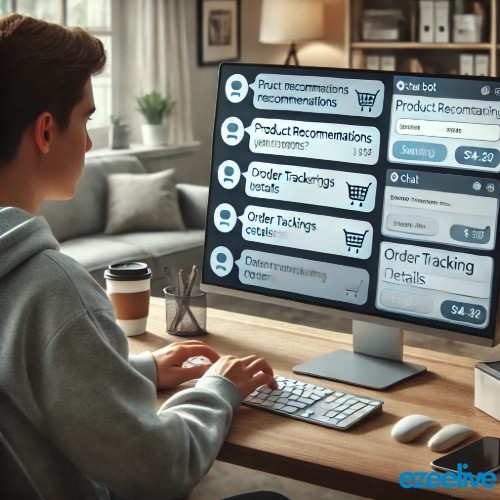
An eCommerce chatbot Google Dialogflow can significantly enhance customer experience, streamline sales, and automate support for online stores. Dialogflow, powered by Google’s Natural Language Processing (NLP), enables businesses to create AI-driven chatbots that interact seamlessly with customers.

Dialogflow is a natural language understanding (NLU) platform by Google that helps developers build conversational interfaces, such as chatbots and voice assistants, for various applications. It is widely used for customer support, virtual assistants, and AI-driven interactions across multiple platforms like websites, mobile apps, WhatsApp, and Google Assistant.
Why Google Diaglogflow is the best choice for chatbot?
1. Advanced NLP & AI: Powered by Google AI for superior intent recognition, entity extraction, and multi-language support.
2. Seamless API & Platform Integration: Easily connects with webhooks, databases, and messaging apps (WhatsApp, Messenger, Telegram, Slack, etc.).
3. Context Management: Enables smooth, human-like conversations with memory retention and follow-up intent handling.
4. Machine Learning & Continuous Improvement: Learns from interactions to improve response accuracy over time.
5. Scalability & Security: Hosted on Google Cloud, ensuring high availability, security, and compliance.
6. Voice & Multimodal Support: Integrates with Google Assistant, IVR systems, and voice bots for omnichannel experiences.
7. Low-Code & Easy to Use: Drag-and-drop UI, pre-built agents, and simple setup for faster development.
8. Cost-Effective & Pay-as-You-Go: Flexible pricing with a free tier for small projects and startups.
Define the Chatbot in Dialogflow (Ecommerce Chatbot Google Dialogflow)
Dialogflow is a natural language understanding platform that allows you to create conversational experiences.
Steps to Set Up Dialogflow
- Create a Dialogflow Account
- Create an Agent: Click on “Create Agent” and give it a name (e.g., EcommerceChatbot).
- Define Intents: Intents represent different user queries. Some common intents for an eCommerce chatbot are:
- Product Search: Fetch product details from an API.
- Order Tracking: Get order status via API.
- Add to Cart: Add items to a user’s cart.
- Checkout: Fetch payment details.
- Customer Support: Connect users to a live agent.
- Train the Agent: Add training phrases and responses to each intent.
- Set Up Fulfilment: To integrate Python for business logic, enable the “Fulfilment” option and write webhook logic in Python.
Build Python Backend for Fulfilment
Dialogflow sends requests to a webhook when a user query needs processing. We’ll build a Python Flask-based webhook.
Install Dependencies:
pip install flask dialogflow google-authCreate Webhook in Python:
from flask import Flask, request, jsonify
import requests

app = Flask(__name__)

# Dummy API URLs (Replace with real APIs)
PRODUCT_API_URL = "https://fakestoreapi.com/products"
ORDER_API_URL = "https://fakestoreapi.com/orders"
CART_API_URL = "https://fakestoreapi.com/carts"

@app.route('/webhook', methods=['POST'])
def webhook():
    req = request.get_json()
    intent = req['queryResult']['intent']['displayName']
    parameters = req['queryResult']['parameters']

    if intent == "Product Inquiry":
        product_name = parameters.get("product")
        response_text = fetch_product(product_name)

    elif intent == "Order Tracking":
        order_id = parameters.get("order_id")
        response_text = track_order(order_id)

    elif intent == "Add to Cart":
        product_id = parameters.get("product_id")
        quantity = parameters.get("quantity", 1)
        response_text = add_to_cart(product_id, quantity)

    elif intent == "Checkout":
        response_text = checkout()

    elif intent == "Customer Support":
        response_text = "You can contact our support team at support@example.com or call +123456789."

    else:
        response_text = "I'm not sure how to handle that request."

    return jsonify({"fulfillmentText": response_text})


def fetch_product(product_name):
    """Fetch product details from an API."""
    response = requests.get(PRODUCT_API_URL)
    products = response.json()
    for product in products:
        if product_name.lower() in product['title'].lower():
            return f"Product: {product['title']}\nPrice: ${product['price']}\n{product['description']}"
    return "Sorry, we couldn't find that product."


def track_order(order_id):
    """Fetch order status from an API."""
    response = requests.get(f"{ORDER_API_URL}/{order_id}")
    if response.status_code == 200:
        order = response.json()
        return f"Your order {order_id} is currently {order['status']}."
    return "Invalid order ID. Please check and try again."


def add_to_cart(product_id, quantity):
    """Add item to cart via API."""
    cart_data = {"userId": 1, "date": "2024-02-11", "products": [{"productId": product_id, "quantity": quantity}]}
    response = requests.post(CART_API_URL, json=cart_data)
    if response.status_code == 200:
        return "Item added to cart successfully!"
    return "Failed to add item to cart."


def checkout():
    """Simulate checkout process."""
    return "Proceed to checkout by clicking [here](https://example.com/checkout)."


if __name__ == '__main__':
    app.run(port=5000, debug=True)
Deploy the Webhook:
- Host the Python webhook using Flask, FastAPI, or Cloud Functions.
- Deploy it on Heroku, AWS, or Google Cloud Functions.
- In Dialogflow, go to Fulfilment → Enable Webhook → Enter your webhook URL.
Add Dialogflow Intents with Parameters
Go to Dialogflow Console and update the following intents:
1. Product Inquiry
- Training Phrases:
- “Do you have {product}?”
- “Show me {product} details.”
- Parameter:
- Name:
product, Entity:@sys.any
- Name:
2. Order Tracking
- Training Phrases:
- “Where is my order {order_id}?”
- “Track order {order_id}.”
- Parameter:
- Name:
order_id, Entity:@sys.number
- Name:
3. Add to Cart
- Training Phrases:
- “Add {quantity} of {product_id} to my cart.”
- “I want to buy {product_id}.”
- Parameters:
- Name:
product_id, Entity:@sys.number - Name:
quantity, Entity:@sys.number(Optional)
- Name:
4. Checkout
- Training Phrases:
- “I want to check out.”
- “Proceed to payment.”
5. Customer Support
- Training Phrases:
- “I need help with my order.”
- “Connect me to an agent.”
Build the Frontend Using React.js & HTML
Install React App
npx create-react-app ecommerce-chatbot
cd ecommerce-chatbot
npm install axios
Create Chatbot Component
Create a file Chatbot.js inside src/components/.
import React, { useState } from "react";
import axios from "axios";

const Chatbot = () => {
  const [messages, setMessages] = useState([]);
  const [input, setInput] = useState("");

  const sendMessage = async () => {
    if (!input) return;

    const userMessage = { sender: "user", text: input };
    setMessages([...messages, userMessage]);

    try {
      const response = await axios.post("http://localhost:5000/webhook", {
        queryResult: { intent: { displayName: detectIntent(input) }, parameters: extractParameters(input) }
      });

      const botMessage = { sender: "bot", text: response.data.fulfillmentText };
      setMessages([...messages, userMessage, botMessage]);
    } catch (error) {
      setMessages([...messages, userMessage, { sender: "bot", text: "Sorry, something went wrong." }]);
    }

    setInput("");
  };

  const detectIntent = (input) => {
    if (input.toLowerCase().includes("order")) return "Order Tracking";
    if (input.toLowerCase().includes("add to cart")) return "Add to Cart";
    if (input.toLowerCase().includes("checkout")) return "Checkout";
    if (input.toLowerCase().includes("support")) return "Customer Support";
    return "Product Inquiry";
  };

  const extractParameters = (input) => {
    const orderIdMatch = input.match(/\d+/);
    return orderIdMatch ? { order_id: orderIdMatch[0] } : {};
  };

  return (
    <div style={{ maxWidth: "400px", margin: "auto", padding: "20px", border: "1px solid #ccc" }}>
      <h3>Chat with Us</h3>
      <div style={{ height: "300px", overflowY: "auto", borderBottom: "1px solid #ccc" }}>
        {messages.map((msg, index) => (
          <div key={index} style={{ textAlign: msg.sender === "user" ? "right" : "left" }}>
            <p style={{ background: msg.sender === "user" ? "#ddd" : "#eee", padding: "5px", borderRadius: "5px" }}>
              {msg.text}
            </p>
          </div>
        ))}
      </div>
      <input type="text" value={input} onChange={(e) => setInput(e.target.value)} placeholder="Type a message..." style={{ width: "80%", padding: "5px" }} />
      <button onClick={sendMessage} style={{ padding: "5px" }}>Send</button>
    </div>
  );
};

export default Chatbot;
Integrate Chatbot in HTML Page
Inside src/App.js, import and use the chatbot component:
import React from "react";
import Chatbot from "./components/Chatbot";

function App() {
  return (
    <div>
      <h1>E-commerce Chatbot</h1>
      <Chatbot />
    </div>
  );
}

export default App;
Run the Frontend
npm startBuilding an eCommerce chatbot using Google Dialogflow enables businesses to provide 24/7 customer support, improve engagement, and increase sales. By setting up Dialogflow intents, configuring fulfillment, integrating payment processing, and deploying across multiple platforms, you can create an intelligent and efficient chatbot for your online store.
Need help with chatbot development? Start building your eCommerce chatbot Google Dialogflow today!
Conslusion
In today’s fast-paced digital marketplace, delivering seamless and personalized customer experiences is no longer optional it’s essential. By leveraging the power of Ecommerce Chatbot Google Dialogflow, businesses can transform their customer engagement, streamline support operations, and drive more conversions. From handling product inquiries to guiding users through the checkout process, Dialogflow enables the creation of intelligent, responsive chatbots tailored for ecommerce needs. Whether you’re starting small or scaling your online store, crafting an effective chatbot with Google Dialogflow can be the key to staying competitive and enhancing customer satisfaction in the ecommerce space.


Leave a Reply